Sydney homes are blessed with airy verandahs and lofty ceilings – but the subtropical humidity can challenge even the sturdiest timber trim. When it comes to Internal Carpentry Sydney, it’s not just a matter of nailing some wood to the wall. Whether you’re renovating a heritage Queenslander or a sleek city apartment, quality joinery must marry style with practicality. Luckily, local Architraves and Mouldings Specialists have hammered out the secrets to timber success under the Sydney sun.
Think of skirting boards and architraves as your home’s finishing act: done right, crisp trim ties a room together like a perfectly knotted bow tie, but get it wrong and it sticks out like a sore thumb. Read on for insider tips (with a dash of humour and cautionary tales from our own DIY misfires) on choosing materials, matching design, and beating Sydney’s humidity (yes, we speak from experience – our own nail-gun misfires and paint-dripped fingertips have taught us plenty!).
Choosing the Right Timber
Sydney carpentry pros note that timber mouldings are a tiny fraction of a renovation (often ~1–1.5% of cost) but can deliver up to 30% more curb appeal. So it pays to pick wisely. Plantation Radiata pine or finger-jointed (FJ) pine are stalwarts for skirtings and architraves, balancing low cost with decent performance. Intrim Mouldings points out that FJ pine is “sustainable and economical” for most interior trim. For a more premium option, Western Red Cedar is sometimes used too – prized for its stability and natural insect resistance (though it’s a rare luxury). Real timber boards can be sanded and repaired if dented, whereas MDF – while ultra-smooth – will swell if it gets wet. The table below compares common materials:
| Material | Pros | Cons | Best Use / Notes |
| MDF (Medium-Density Fibreboard) | Very smooth, flat finish; low cost | Swells with moisture; chips or dents; emits toxic dust when cut | Dry, low-traffic areas; fully prime/paint all sides (to prevent moisture ingress) |
| FJ Pine (Finger-Jointed Pine) | Real timber look; holds nails well; lightweight | Slightly more expensive; may show knots/veins (fill if needed) | Versatile choice; many QLD homes use this sustainable softwood |
| Hardwood (e.g. Tasmanian Oak, Spotted Gum) | Can be stained/raw-finished to highlight grain; very durable | Expensive; longer lead times; limited lengths | Ideal for feature trims, entryways or heritage-style homes; naturally moisture-resistant |
Styling Your Carpentry to the Home
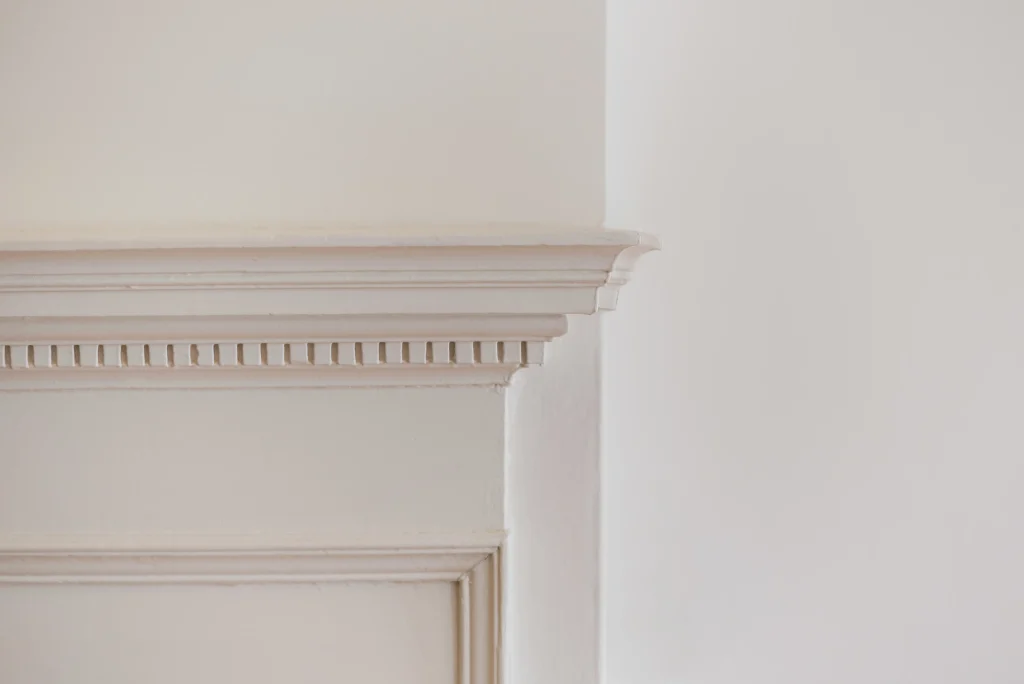
Queenslander-style interior with timber architraves and skirting. In heritage Queenslander houses, trims often echo bygone elegance: tall, carved skirtings and detailed architraves set off lofty ceilings. A renovation might even preserve or exactly match original architraves and skirtings to keep that period character. In contrast, modern apartments favour simplicity: square-set architraves and flat skirtings look clean and contemporary. Many Queenslanders also feature decorative picture rails and ceiling roses that complement the skirtings and architraves, adding another layer of old-world charm. (Think of good trim as the hat on a tailored suit – it pulls the entire look together.)
Architraves and Mouldings Specialists
Sydney architraves and mouldings specialists often suggest mixing old and new intelligently. As architect Tom Favell advises, “Don’t be afraid … to put modern trims in a new extension,” because the simple lines of modern detailing will “balance the detail of the existing”. Favell also notes that even a plain 60mm-square trim can be its own statement – “clean, simple details can be a feature”. For flair, choose a decorative profile (Colonial, Ovolo, bullnose, etc.) that suits your home’s character.
Stain your architraves and skirtings to match timber floors or paint them bright white for contrast – consistency ties everything together. As one Sydney timber moulding supplier points out, the right trim can “elegantly elevate the look, feel, and atmosphere of any space”, so don’t be shy about a signature moulding.
Popular Styles for Internal Carpentry Sydney Homes
Sydney homes are a style smorgasbord from breezy Hamptons vibes to gritty industrial lofts.
- Queenslander Revival: Think ornate skirtings, VJ panelling, and wide architraves with curved heads. Perfect for heritage flair.
- Coastal Modern: Light timbers, subtle profiles, and minimal joins. Painted in soft neutrals like eggshell white or driftwood grey.
- Urban Contemporary: Sleek shadow-line skirtings and square-set architraves in matte black or charcoal for bold contrast.
Your trim style should flow with your floors, doors and ceiling lines. Match the profile (and finish) to your interior theme so it feels consistent across every room.
The Hidden Framework: Why Internal Carpentry Starts Beneath the Surface
While most people notice the final flourish—your architraves, skirtings, and cornices—the truth is, great internal carpentry begins behind the scenes. Think of it like skincare before makeup: what lies beneath determines how well everything on top performs (and lasts).
1. Understanding Wall Framing and Straightness
Many Sydney homes, especially older Queenslanders, come with wonky walls and sloped floors. If you’ve ever tried to install a skirting board only to find a 10mm gap halfway down the wall, this is why. Proper framing alignment is key—before you install any trim, check the surface it’s going on. Professional carpenters will use:
- Laser levels to check wall plumb and floor level
- Straightedges or string lines for long runs
- Packers and shims to even out imperfections
Ignoring this step can result in architraves lifting, skirtings cracking, or visible gaps that ruin the clean lines you were going for.
2. Wall Materials and Fixing Considerations
The material beneath your paint plays a major role in how internal carpentry behaves over time. Sydney homes commonly use:
| Wall Type | Trim Fixing Notes |
| Plasterboard | Easy to nail or glue skirtings, but needs stud marking |
| Masonry (Brick or Block) | Requires masonry adhesive or wall plugs for fixing |
| VJ Timber Boards | Usually nailed straight in, but may shift with temperature |
For plasterboard walls, knowing where your studs run makes all the difference. Use a stud finder (or knock test) and mark stud locations clearly before you fix your skirting boards or heavy architraves. This ensures they stay flush over time and don’t pull away with seasonal movement.
3. Moisture Barriers & Sealing
In wet-prone zones like laundries, bathrooms, and entryways, it’s wise to:
- Use a waterproof sealant between the base of the skirting and floor
- Apply two coats of primer on all moulding sides (especially raw MDF)
- Allow a 3–5mm expansion gap behind trim if close to plumbing or tiling
Moisture can creep up from tiles or concrete slabs and into the timber. This causes swelling, warping, or even fungal damage—especially if your skirting touches damp areas frequently (like near a shower recess or laundry sink). If you’re planning a bathroom reno, consider PVC or treated pine trims for durability.
4. Fixings, Adhesives, and Fasteners
Professional fixings can mean the difference between trim that’s flush and firm vs. trim that shifts, cracks, or falls off over time. Here’s what Sydney carpenters recommend:
- Nails or Brad Nails (50–65mm): Good for FJ pine or hardwood trims into timber studs
- Liquid Nails / Construction Adhesives: Adds grip but needs backing with nails
- Countersinking and Puttying: To hide nail heads before painting
5. Fire and Acoustic Ratings: More Than Just Looks
In multi-storey dwellings or duplexes, internal carpentry plays a part in fire separation and acoustic performance. Architraves around fire-rated doors, for instance, must comply with AS1530.4 standards. Acoustic-rated trims (used around bedrooms or home theatres) may require additional foam seals or solid-core backing.
If you’re building a dual-occupancy property or granny flat, consult your builder or architect about performance-rated mouldings. These aren’t just nice-to-haves—they’re building code essentials.
6. Sustainability & Certifications to Look For
For eco-conscious homeowners, internal timber choices carry weight. Look for:
- FSC® or PEFC™ certifications – ensures timber was ethically sourced
- Low-VOC paints and finishes – better indoor air quality
- Engineered or recycled timber – durable with lower carbon footprint
To understand more about sustainable forest management practices in Queensland, refer to the Queensland Sustainable Timber Industry Framework, which outlines the state’s commitment to balancing environmental values with timber industry growth.
Battling Sydney’s Humidity
Our subtropical climate (average indoor humidity ~52%) means moisture control is crucial. Wood soaks up humidity like a sponge, so internal timber can swell or warp if left unchecked. Experts warn that untreated wood will expand in humid conditions and eventually crack. Aim for indoor humidity around 40–60% – run the air-con or a dehumidifier in the sticky season. Have your timber kiln-dried to ~6–8% moisture and let it acclimatise to your home’s air before fitting. After installation, seal the wood well. For example, a penetrating timber oil (like CUTEK®) sinks deep into the wood and helps repel moisture, preventing cupping or cupping. Finish with a durable lacquer or polyurethane coat for extra protection.
In daily life, wipe down any spills on skirtings promptly and avoid steam cleaners near timber. Keep rooms ventilated so moisture doesn’t linger. If water ever pools near a wall (say from a planter or pet bowl), dry it off quickly. These simple steps – along with controlled humidity and regular finish re-coats – will help your woodwork sail through Sydney’s wettest months.
Ensuring Design Cohesion
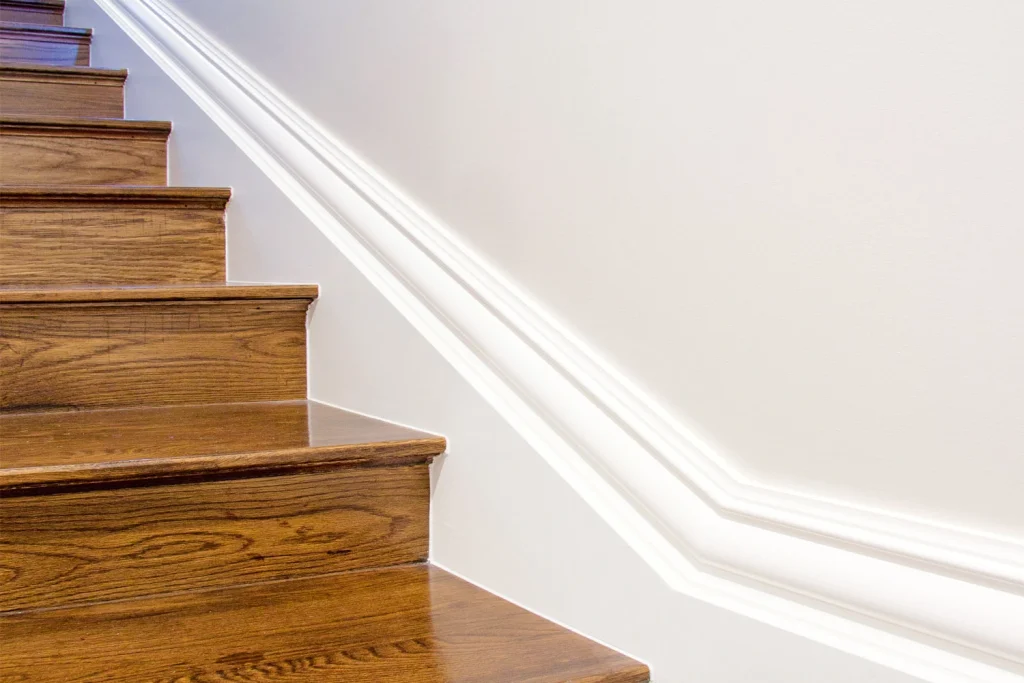
A consistent trim colour ties a space together. In the example above, all skirtings and door frames use the same paint, letting the warm hardwood floor be the star. Avoid random mixing – painting one room’s trim dark and the next’s white, for instance, can look disjointed. Instead, echo your floor or wall colour across all trims. Uniformity makes the design feel intentional, not patchy.
Avoiding DIY Pitfalls
Internal trim work can be deceptively fiddly – it’s nothing like assembling flat-pack furniture, and more like solving a 3D jigsaw puzzle with power tools. Even a small error shows up on skirting or architrave. Intrim’s installation guide recommends planning ahead – order about 15% extra material to cover mistakes. Common DIY gaffes include sloppy mitre cuts, uneven heights, or forgetting to mark each corner’s 5mm “quirk” for alignment. Another trap is skimping on edge-sealing: unprimed MDF edges will swell up. Instead, carpenters seal or prime all sides before installation. Pros often use a combination of adhesive and nails, then fill any holes for a seamless finish.
If this all sounds like a headache, it’s because Internal Carpentry Sydney really is a craft! Specialists have the right tools and experience to avoid these pitfalls. If precision matters (and it usually does), it’s often wise to call in a carpenter or architraves and mouldings specialist. They’ll handle the tricky mitres, adhesives and touch-ups so you get crisp, gap-free trim without the stress.
In summary, thoughtful timber choices, well-matched style and diligent maintenance will keep your Sydney carpentry shipshape. A little investment in the right materials – and maybe a chat with local architraves and mouldings specialists – can make all the difference. (Remember: measure twice and cut once – and if in doubt, give a Sydney specialist a call!) Ready to give your home some timber TLC? Reach out to a Sydney joinery expert and they’ll help you marry beautiful design with our sticky climate.
Frequently Asked Questions
What is the best timber for internal carpentry in Sydney?
Use finger-jointed pine or Tasmanian oak; both are stable and suit the humid climate. Avoid raw MDF in wet zones unless fully sealed.
Should I hire a specialist for architraves and mouldings installation?
Yes. Specialists ensure precise cuts, tight joints, and a flawless finish—saving you time, frustration, and costly mistakes.
How do I maintain internal woodwork in humid conditions?
Control humidity, seal timber edges, and recoat finishes every few years. Keep trims dry and well-ventilated to avoid swelling.