Timber windows have become a popular choice for Sydney homeowners due to their natural warmth, aesthetic appeal, and long-term durability. They offer excellent insulation, making them suitable for both heritage homes and modern designs. However, the key to achieving these benefits lies in proper installation — even the best-quality timber window can fail if it’s not installed correctly.
Getting Timber Window Installation in Sydney right the first time is essential for energy efficiency, weather resistance, and structural performance. Poorly installed windows can lead to common issues such as air leaks, water intrusion, and frame warping. Over time, these problems can compromise your home’s comfort and increase maintenance costs.
In this guide, you’ll find step-by-step insights, expert advice, and compliance tips tailored to Sydney’s climate and building standards. Whether you plan to DIY or hire a licensed professional, understanding the fundamentals of Timber Window Installation in Sydney will help you make informed decisions, avoid costly mistakes, and ensure your windows last for decades.
Why Timber Windows?
Timber windows aren’t just a style statement; they’re a practical choice for Sydney’s vibe and climate. Wood brings a warm, organic look that blends beautifully with coastal or heritage homes. It’s also a natural insulator – meaning your house stays cooler in summer and cozier in winter (goodbye soaring energy bills!). Plus, with conscious sourcing you can pick sustainably harvested species that help the planet.
In Sydney’s summer sun and coastal moisture, properly treated timber holds up well – unlike untreated metal, which can heat up or corrode.
| Feature | Timber Windows | Aluminium/UPVC Windows |
|---|---|---|
| Insulation (Energy) | Excellent (natural thermal break) | Good, but often needs a thermal break layer |
| Aesthetic/Style | Classic, warm, high-end look | Sleek, modern; may look colder or industrial |
| Durability | Very durable if well-painted/treated | Extremely durable; resistant to rust |
| Maintenance | Requires periodic painting/sealing | Low maintenance; just clean occasionally |
| Cost (Materials) | Mid to high (depends on wood type) | Variable (aluminium can be pricey; uPVC cheaper) |
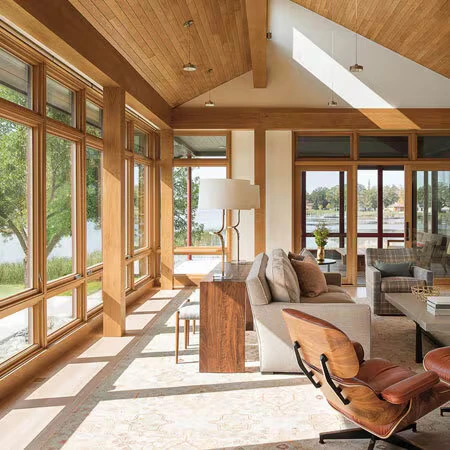
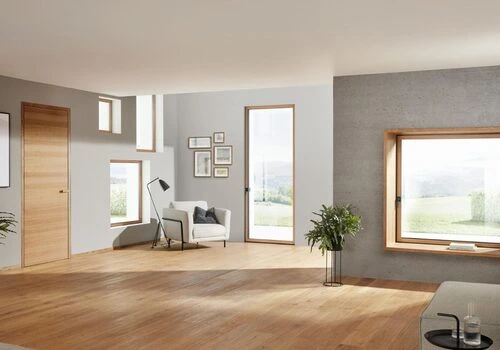
Insert image of a modern Sydney home with stylish timber windows here, highlighting how beautifully wood frames complement local architecture.
Plan and Prepare Like a Pro
First thing’s first: measure twice, cut once (or better yet, have a pro cut your timber!). Accurate measurements are crucial for timber window installation in Sydney. Measure the height, width and reveal of each opening carefully, and jot down the dimensions.
Remember to check level and plumb – your walls and sills may not be perfectly square. A little adjustment now saves big headaches later. Consult the window manufacturer’s instructions for clearance requirements: an industry guide advises allowing extra “adequate clearance” beyond the frame size to fit shims and sealant.
Get your toolkit ready. Essential items include: a spirit level, tape measure, sturdy screwdrivers or drill, galvanised nails or screws, wood shims/packers, a caulking gun, waterproof flashing tape or metal flashing, exterior-grade sealant, and safety gear. If you’re in Sydney, also pick up a good wood primer or paint (for UV protection), and maybe a termite barrier product. Quick checklist:
- Tools: Measuring tape, level, shims, drill, hammer, saw (if trimming needed), caulking gun.
- Materials: Treated hardwood or marine-grade softwood frames, stainless or galvanised fixings, waterproof flashing tape, silicone sealant, exterior primer/paint.
Pro tip: In Sydney’s salty coastal air, stainless or galvanised hardware prevents rust. And if your house is in a bushfire zone, make sure your timber windows meet the required BAL rating (Bushfire Attack Level) – your local council or builder can guide you on that.
Before any hammer swings, check local building codes and approvals. In NSW, the Guide to Standards and Tolerances spells out that windows must be installed and flashed per the manufacturer’s instructions and Building Code rules. You don’t want your new windows “defective” right off the bat, so do your homework or hire a licensed installer.
For example, the NSW government provides a Guide to Standards and Tolerances 2017 that’s a handy reference. Compliance kept easy = homeowner’s peace of mind.
Sydney-Smart Considerations
Sydney’s climate throws a few curveballs at installations. The summer sun can be brutal, and spring downpours come fast. Good weatherproofing is a must. Always install a continuous flashing around the sill and jambs to channel rain away – missing or smothered flashing is a prime culprit for leaks. Make sure you include weep holes (small drainage holes) in the sill so any water that sneaks in can escape. The AWA industry guide stresses: “ensure sill is fully supported” and “weeping weep holes must be provided to let the water out”.
Termites love Sydney’s humidity, so use H3-treated or better timber for any outdoor/exposed framing. T2 Blue pine (above-ground) or Merbau are popular. If you’re using softer woods (like pine), paint or seal them thoroughly and consider a hidden termite barrier between frame and house. Also account for movement: timber swells slightly with moisture and shrinks in dry heat. The NCC actually requires a ~10mm clearance gap at the top to allow for any settling or seasonal shift. Don’t leave it jammed tight!
And a quick safety note: NSW is even updating regulations to make homes safer for kids. They’re proposing mandatory window locks or restrictors on “high-risk” windows (those opening near floors) to prevent accidents. So as you install your timber windows in Sydney, think about screens or child-safe hardware for low or elevated openings – a small extra step that could save a life.

Step-by-Step Installation Guide
Ready to put it all together? Here’s a simplified installation process to follow. I’ve added notes based on Aussie standards and best practices:
- Remove old frame (if replacing): Carefully pry out old window, clean the opening. Repair any rot or damage to the surrounding frame or sill. Ensure the rough opening is solid, level, and true.
- Dry-fit the new timber frame: Set the new window frame into the opening without fixings. Check the fit. There should be a small uniform gap around all sides for packing. (Tip: The industry guide suggests openings = frame size + clearance.)
- Apply flashing tape or membrane: Run waterproof flashing tape along the sill first (into the jamb), then up the sides, and on the head. This creates a shingle effect so water sheds away. If you skip proper flashing, even a skilled carpenter will face leaks!
- Insert the window frame: With help (windows can be heavy), place the frame into the opening. Use wooden packers (shims) at corners and midpoints to hold the frame level and square. The frame must be plumb and flat – even a small twist will make sashes jam. Check with a spirit level vertically (jambs) and horizontally (sill).
- Secure the frame: Fix it in place through the studs, not the face of the trim. As the AWA guide recommends, “timber windows should be secured by back nailing through stud” rather than pounding through the decorative face. In brick or concrete walls, use building lugs (galvanised clips) about every 450mm. This holds the frame without distorting it.
- Check the top gap: Make sure you’ve left about a 10mm gap at the head between the frame and lintel (or top of opening). This allows the frame to settle slightly without bowing. Packers may be needed here too.
- Install sashes or glass: If not already fitted, carefully fix the glass panes or re-insert sashes. Install glazing bead or stops as needed. Ensure weather strips and seals are in place so the window closes snugly.
- Seal and caulk: Run a bead of high-quality exterior caulk around the frame perimeter, catching any flashings underneath. Fill any small gaps. Be neat – a well-caulked window will stay draft-free. Don’t seal over weep holes! (Those weep holes are lifesavers when it rains.)
- Attach trim and hardware: Refit interior architraves or exterior trim to cover the gap. Install locks, handles, screens or security devices. Check that the window opens and closes smoothly – adjust shim if it’s binding.
- Final touches: Give the window a wipe-down, and paint or stain the frame (inside and out) as per your finish plan. Paint provides UV and weather protection, especially important in Sydney’s sun.
Throughout this process, constant leveling and checking is key. Even a tiny mistake on one side can make the window lop-sided. It’s worth a couple of extra checks with your level and square to be sure. Remember: per the building code, the frame isn’t load-bearing, so nothing heavy (like wall above or braces) should be pressing down on it. Once everything is in place, sit back and admire that precise workmanship!
Common Pitfalls (and How to Avoid Them)
- Skipping Flashing or Weep Holes: Without proper flashing and drainage, water will find its way in. As the industry guide bluntly warns, missing flashing or blocked weep holes are “prime causes of leaks”. Always protect your investment by installing complete flashing and leaving sill gaps.
- Nailing Through the Face: It might be tempting to just hammer nails through the front trim for speed. Don’t! This can warp the trim and is harder to fix. Always back-nail through the side studs or use clips, so the visible frame stays pristine.
- Ignoring Level and Plumb: A slightly out-of-square window will bind, jam, or look crooked. Double-check levels often while you shim. It pays off to get it dead-on straight.
- Using the Wrong Fixings: Exterior timber likes rust like you’d welcome termites – avoid it. Use stainless or hot-dipped galvanised screws/nails and exterior-grade sealants only.
- Not Treating the Wood: Raw timber won’t last in Sydney’s humidity and UV without a coat of protection. Paint or stain before and after installation to lock out moisture and pests.
- Over-tightening: Driving screws too hard or too many can squeeze the frame crooked. Tighten snugly, but don’t crush the timber. The wood should still have a tiny bit of “give” to accommodate expansion.
- Forgotten Safety: If you have kids or grandchildren, think about safety hardware before installation. Locks or restrictors on low windows can prevent accidents (and might soon be required by law in NSW).
Aftercare and Maintenance
Got your new timber windows shining? Great – but don’t pack away the toolbelt just yet. A little maintenance goes a long way in keeping them perfect. Every 1–2 years, inspect the paint or sealer. Touch up any chips or worn spots to keep moisture out of the wood. Re-caulk around the edges if old sealant shows cracks. Clean the tracks and weep holes too (blow out leaves/dust) so water can drain freely.
Learn from heritage homes: many old Sydney houses with original timber windows have outlasted their owners because they were lovingly cared for. Make greasing the hinges and wiping the glass part of your seasonal checklist. It’s like giving your windows a spa day so they can last for decades. Well-installed timber windows can outlive us if we treat them right!
Regulations, Energy, and Safety
Whether you DIY or hire a pro, ensure your timber window installation in Sydney ticks the boxes for legality and efficiency. The NCC (Building Code of Australia) requires no loads on the window frame and a minimum 10 mm top clearance — see the official NCC Part 8.2 – Windows and External Glazed Doors for detailed glazing and clearance requirements.
The NSW Guide to Standards and Tolerances clearly states that any external window not installed or flashed to spec is considered defective. In other words, if it’s not done correctly, it’s not up to standard. So, play by the rules: follow manufacturer specs, building codes, and use quality materials.
On the plus side, properly installed timber windows can boost your home’s efficiency. As noted earlier, wood’s natural insulating property means less energy is wasted on heating or cooling. Consider pairing new timber frames with double glazing – you’ll then improve soundproofing and thermal performance even more (a wise move for Sydney’s summers and chilly winter mornings).
Some suburbs even have incentives or rebates for eco-upgrades, so check if NSW or your local council offers any help for energy-efficient windows.
Final Tip: Book a building inspection or certifier to sign off on your work if it’s required. It might seem like extra paperwork, but it ensures everything is airtight legally. Plus, a certificate can add value if you sell the home later.
Conclusion
Getting Timber Window Installation in Sydney right the first time is absolutely doable with a bit of planning and care. From choosing the right timber and treating it, to measuring accurately, packing the frame plumb, and flashing it properly – each step is key. When done well, you’ll enjoy the best of both worlds: gorgeous windows that suit Sydney style and the practical benefits of a well-built home.
So grab your tools (or the right contractor), follow these steps, and turn those dream timber windows into reality. You’ll not only enhance your home’s look and comfort, but also your peace of mind. Ready to see your project through? Measure twice, install once, and enjoy the view through crystal-clear, well-installed timber windows!
FAQs
How much does timber window installation cost in Sydney?
Timber Window Installation in Sydney typically costs $800–$2,000+ per window, depending on size, glazing, and finish quality.
Can I install timber windows myself, or should I hire a pro?
DIY Timber Window Installation in Sydney is possible, but hiring a pro ensures perfect alignment, weather sealing, and compliance with local standards.
How often should I maintain or repaint timber windows?
For long-lasting Timber Window Installation in Sydney, inspect and repaint every 3–5 years to protect wood from UV and moisture.
Are timber windows energy efficient?
Yes, Timber Window Installation in Sydney improves energy efficiency since wood insulates naturally, reducing heating and cooling costs.
What is the best time of year to install windows in Sydney?
The ideal time for Timber Window Installation in Sydney is spring or autumn, when mild weather helps sealants cure properly


